Monday, November 23, 2009

LUMINESCENCE: final design


FIELD OF LIGHT : GLOW


PLAN : ILLUMINATED


SECTION: PLAN VIEW CUT


ELEVATION: ILLUMINATED


SECTION : CUT FROM MIDDLE OF ELEVATION


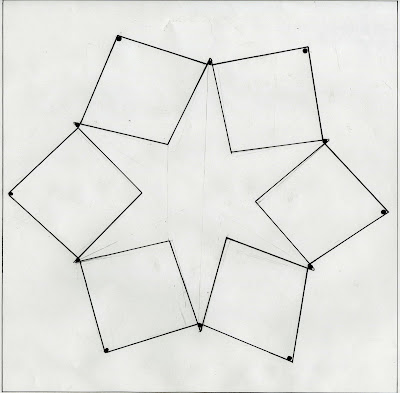
The above drawings were part of this project as well. We could use either pencil or pastel on colored canson paper to depict an elevation, plan, and field of light drawing. I choose to work in colored pencil which involved quite a bit of layering! This is the first project drawings we have done which involved color, I don't normally work in colored pencils so this assignment was a learning process in how to layer and blend additionally.  I added an additional section drawing, I thought it balanced out the composition of my paper more effectively.


ILLUMINATED MODEL IN THE DARK: PLAN


MODEL IN THE LIGHT: PLAN


ILLUMINATED MODEL IN THE DARK: ELEVATION


MODEL IN THE LIGHT: ELEVATION


  Twelve trapezoidal faces held at a slight curve. Inspired by the warm glow cast in the pictures of the parking garages at night (see below in luminaire research) Made once again of acetate, tracing paper, and bamboo skewers. The faces that you see are made out of the yellow and orange acetate and the tracing paper, while the bamboo skewers internally help support the structure. This model faced many challenges in its creation because acetate  doesn't like to be help at a curve...even less so when doubled as I did with yellow and orange sheets. When I sketched this model out I did not mean for the trapezoid faces to be overlapping, but as it came together I experienced the happy accident of the mod-looking edges and shapes of richer color that were made when the trapezoids overlap as they do it the model above. The material shaped what my project became.  Although I'm happy with my final result I learned a lesson in how hard acetate is to work with.  Finally, I'm satisfied with the warm glow my final model projects. I hope you enjoy it as well!


Sunday, November 8, 2009

sketchbook brainstorming, first sketch model, second model before final product


Sketchbook brainstorming...I decided I wanted to make a lantern with a marmalade-like glow. Using yellow and orange acetate  I planned to create scales in a pattern that would allow some pure light to peak through, casting interesting light patterns on the ceiling.


SKETCH MODEL

In no way a final. A sketch model which helped me in finding out what my materials can and cannot do...apparently acetate doesn't like to bend. First trials can be very helpful in figuring out these sort of things


SECOND MODEL


My luminaire casting its marmalade-y color of light on a dry erase board in a dark room.


The star-like light pattern.


These two images above and below are examples of the kind of light I was aiming for.


Using bamboo skewers, I created a hexagonal frame with two rows, which added up to 12 faces. I added triangles of varying sizes so the luminaire would cast light patterns onto a surface, these triangles were a combination of a layer of orange and yellow acetate and a film of tracing paper (to dilute the light). As you can see I did not cover up the top row, but this nakedness developed a harsher light when held at different angles so I decided my final product will conceal the bulb entirely. A little bit of process..

Thursday, November 5, 2009

LIGHT AND LUMINESCENCE


In my next venture I will be designing a luminaire using two materials (besides the actual light and hardware) from my previous projects,  along with a new material of MY choice
...loose restrictions and wide boundaries...
possiblilities galore!

First off I began to research the many fields of light, curiosity is key.
Below are my observations and explorations


SHADOWS AND LIGHTPATTERNS

I love the effect created by the shadow lantern's i found at an online store...I started to ponder what other kind of patterns could be casted on a wall like so. One of my most intriguing finds so far...


Shigeru Ban's archtectual model uses gateways to cast linear rows of light. 


Web surfing yet again, this wall sconce delivers a delicate balance of bright light combined with the soft light that casts loose geometric patterns up and down the wall.


I took interest in the light pattern's created from the natural sunlight and surrounding branches...a touch of natural beauty.


DAYLIGHT: 3:30 p.m.  
...you might have to squint 
Sun rays beaming out of the branch's, a pleasant distortion of light.


Sunlight on a reflective window. This reflection casts intensity of the original source.


The intense glow of the afternoon sun dominates, my classmate included (:


The white wall seems to glow due to the position of the sun at this time (keep that in mind), the Deville's surface reflecting this light along its classy curves.


A building  framing the light coming from a lone window.


HARSH FLORESCENT LIGHTING

Dorm hallway light is harsh but purposeful.


A combination of daylight and florescent light. Do you see difference's in their whites?


Allows us to see yellow and white light side by side.


I swear this light looked hideous from afar...peering straight up at it  the warm grow escaping from its contained space appears much different than the yellow bulbs in the pic above.


Evening Glow


The surrounding deep blues of nightlight range in darkness between these two pictures which is relative to the hour in between taking the photo's. The main focus of this was the nice warm glow the interior hallways cast as night. During the day the florescent light appears white but when night falls a glow like that of a sunset takes place.


SUSPENDED LIGHTING 

Tian Xia Meta light
This product creates an awesome array of patterns on the ceiling, an awesome aspect I would love to incorporate into my luminaire...maybe i'll take some cues from this chandelier along the way.


Tamiri Suspension
The use of color is really spectacular in this product. The combination of the different colors creates this supernova-like effect. Both  lights are from Artemide.

Thursday, October 29, 2009

DIALOG


HORIZONTALLY CUT SECTION ELEVATION


Eye level view from straight on.


A FRONT VIEW 
A display of my intent to create a repetitive pattern.


FINAL PROJECT- PLAN VIEW

SKETCH MODEL


Collage of some preliminary concept inspirations.


DIALOG...
the project above was another involving the limited use of 12 bamboo skewers and 12 4x6 bristol board cards on a 12x12 base. This is not to say in any regards that the ideas that came from these restrictions were limited at all however, the class brought in a diverse assortment of distinctly different projects that went along with our assignment to create a dialog of two spaces. My ideas for the project shifted entirely when I began playing around with the materials, an above image shows the tower like form which was my first "go" at the idea, also some sketchbooks brain-wandering including a rough doodle of the design I based my final project on.

PROJECT REVIEW
The two projects that caught my attention this morning brought a bought a strong sense of unity in my eyes. Although at first glance, Jessica and Kara's projects are extremely dissimilar. Made up entirely of linear lines, Jessica fashioned her 12 bamboo skewers and bristol board cards atop a 12x12 plexi-glass square base. She explored the idea of opposites in collaboration with one another by creating a reflection of the half hexagonal form  adorned with a six skewer beam on the under side of the plexi-glass. Kara's project also explored opposites but in a totally different light...her project was composed of rounded forms opposed to the very linear look of Jessica's project. It consisted of a bristol board half-dome and 12 skewers that were curved opposite to the dome, creating a cage-like pattern atop her circular base made up of a thick foam core. While Jessica's project creates a direct refection through her plexi-glass base, Kara's project derived a sense of reflection as well through her opposing curves. Both projects create a distinct form using this idea resulting in very interesting compositions of negative space.

Saturday, October 24, 2009

JUNK DRAWER + SHADOW BOXES + PERSPECTIVE

Bear with me...I'm learning perspective, there will be many more advanced perspective drawings to come.


So many lines...for this drawing I put my junk drawer items in this shadow box perspective. the concentration of lines makes the boxes look slinky-esque in my eyes. 


Yes, I crammed all of that in a drawer. Everything from a magic 8 ball to an old lunch bag!
I used a structured scribble to fill in come of the shadow, it kind of adds to the messiness although cross hatching looks much cleaner. Theres always next time.

Monday, October 19, 2009

STICKS AND CELL PHONES

Above lies a series of Drawings of varied combinations and close-ups of a stick I found, and my cell phone. Below is a model based off on of the final four drawings (out of the 220), a pine-cone camera symbol. 


My model I choose to do orthographic drawings of...a mix of a pine cone on the end of a stick I found and the symbol on the camera button of my cell phone.


FRONT VIEW-HEAD ON


LEFT SIDE


RIGHT SIDE


PLAN


PERSPECTIVE
I envisioned my pine cone-camera as a crown..atop an old mans head.  i think he is an pacific island king of sorts...or at least thats what he came out to be haha.


Other Models...close ups and combinations